
 |
| BEAUTY OF #DAHAM COCONUT OILS % 100 PURE NATURAL, NOT VERGIN NOT REFINED, NOT DEODORIZE, BUT NATURALLY THE BEST -NOTHING MAN INTERFERED CAN BE BETTER |
ADD DAMARU Coconut Oil -DHAHAM-OR THE NORMAL TRADIONAL WOULD DO THE SAME PROBABLY. to your daily diet to reduce blood pressure.-OR TAKE few spoons of real traditional coconut oil. not the once with fancy name like virgin or white or refined or deodorised etc. Traditional coconut oils has 5000 year history to check back not the fanciful ones that came to market to profit. Await for reasons why we say -COCONUT OILS IS A NEAR MIRACLE OILS CAN BE CONSUMED WITHOUT FURTHER TREATMENT . KEEPING ALL INTACT IS BETTER THAN INTERFERING WITH THE NATURE GIVEN. FOR MORE GO
http://damarusrilanka.blogspot.my/2016/06/miraculous-coconuts-for-sri-lanka-it-is.html
 I DID THIS NEAR JUNGLE WITH THE SOUND OF ANIMALS AND WATER FALL- PRESTO- I NOW A AM A DIFFERENT PERSON.
GET CURED - NATURES WAY- U- FORGOT TO BREATH
 |
| Natures miracle cure for all Ailments |
 Make use of the Diaphragm to inhale and exhale you will then notice stomach in out movement naturally WITHOUT FEELING TIRED
If U can visualize the mechanic of air in-out of chest and nostrils- you will begin to experience a sate of bliss t,calm that cannot be described by words The resulting Joy is unbeatable to any mad made artificial joys of food, alcohol movies etc etc. Why not enjoy free deep breathing for better lifer I call this ANAPANASATHI BHAWANA a traditional method of basic meditation practiced for over 2600 years
Benefits are immense it give a foundation for Absolute increase in productivity as the mind will remain in focus to do the job in had till it is finished effortlessly.If for Golfer the finest way to reduce the score as target hitting will be at best of his ability.
 |
| Visualize the mechanics if U can |
"Do not burn
yourself out. It is not enough to fight for the land; it is even more
important to enjoy it. While you can. While it is still there. So get out
there and mess around with your friends, ramble out yonder
and explore the forests, encounter the grizz, climb the mountains,
bag the peaks. Run the rivers, breathe deep of that yet sweet and
lucid air, sit quietly for a while and contemplate the precious
stillness, that lovely, mysterious and awesome space. Enjoy
yourselves, keep your brain in your head and your head firmly attached to
the body, the body active and alive, and I promise you this much: I
promise you this one sweet victory over our enemies, over those
deskbound people with their hearts in a safe deposit box and their
eyes hypnotized by desk calculators. I promise you this: You
will outlive the bastards."
 |
| feel the flattening of diaphragm |
Breathing correctly is not only important for living longer but also to have a good mood and keep performing at your best. Let us look at the benefits of deep breathing and why you should make it part of your everyday living.
1. Breathing Detoxifies and Releases Toxins
Your body is designed to release 70% of its toxins through breathing. If you are not breathing effectively, you are not properly ridding your body of its toxins i.e. other systems in your body must work overtime which could eventually lead to illness. When you exhale air from your body you release carbon dioxide that has been passed through from your bloodstream into your lungs. Carbon dioxide is a natural waste of your body's metabolism.
2. Breathing Releases Tension
Think how your body feels when you are tense, angry, scared or stressed. It constricts. Your muscles get tight and your breathing becomes shallow. When your breathing is shallow you are not getting the amount of oxygen that your body needs.
3. Breathing Relaxes the Mind/Body and Brings Clarity
Oxygenation of the brain reducing excessive anxiety levels. Paying attention to your breathing. Breathe slowly, deeply and purposefully into your body. Notice any places that are tight and breathe into them. As you relax your body, you may find that the breathing brings clarity and insights to you as well.
4. Breathing Relieves Emotional Problems
Breathing will help clear uneasy feelings out of your body.
5. Breathing Relieves Pain.
You may not realize its connection to how you think, feel and experience life. For example, what happens to your breathing when you anticipate pain? You probably hold your breath. Yet studies show that breathing into your pain helps to ease it.
6. Breathing Massages Your Organs
The movements of the diaphragm during the deep breathing exercise massages the stomach, small intestine, liver and pancreas. The upper movement of the diaphragm also massages the heart. When you inhale air your diaphragm descends and your abdomen will expand. By this action you massage vital organs and improves circulation in them. Controlled breathing also strengthens and tones your abdominal muscles.
7. Breathing Increases Muscle
Breathing is the oxygenation process to all of the cells in your body. With the supply of oxygen to the brain this increases the muscles in your body.
8. Breathing Strengthens the Immune System
Oxygen travels through your bloodstream by attaching to haemoglobin in your red blood cells. This in turn then enriches your body to metabolise nutrients and vitamins.
9. Breathing Improves Posture
Good breathing techniques over a sustained period of time will encourage good posture. Bad body posture will result of incorrect breathing so this is such an important process by getting your posture right from early on you will see great benefits.
10. Breathing Improves Quality of the Blood
Deep breathing removes all the carbon-dioxide and increases oxygen in the blood and thus increases blood quality.
11. Breathing Increases Digestion and
Assimilation of food
The digestive organs such as the stomach receive more oxygen, and hence operates more efficiently. The digestion is further enhanced by the fact that the food is oxygenated more.
12. Breathing Improves the Nervous System
The brain, spinal cord and nerves receive increased oxygenation and are more nourished. This improves the health of the whole body, since the nervous system communicates to all parts of the body.
13. Breathing Strengthen the Lungs WILL CURE ASTHMA
As you breathe deeply the lung become healthy and powerful, a good insurance against respiratory problems.
14. Proper Breathing makes the Heart Stronger.
Breathing exercises reduce the workload on the heart in two ways. Firstly, deep breathing leads to more efficient lungs, which means more oxygen, is brought into contact with blood sent to the lungs by the heart. So, the heart doesn't have to work as hard to deliver oxygen to the tissues. Secondly, deep breathing leads to a greater pressure differential in the lungs, which leads to an increase in the circulation, thus resting the heart a little.
15. Proper Breathing assists in Weight Control.
If you are overweight, the extra oxygen burns up the excess fat more
efficiently. If you are underweight, the extra oxygen feeds the starving
tissues and glands.
16. Breathing Boosts Energy levels and Improves Stamina
17. Breathing Improves Cellular Regeneration
18. Breathing Elevates Moods
Breathing increase pleasure-inducing neurochemicals in the brain to elevate moods and combat physical pain

MY
OWN EXPERIENCE
 |
| THEY SAID i have cardiomypathy, Atrial fibrillation,Arrhythmia etc a death certificate. Depp breathing cured all.I got back life without cost |
20 WILL CURE Asthma
How to Breathe properly?
In order to breathe
properly you need to breathe deeply into your abdomen not just your chest. Even
in the old Greek and Roman times the doctors recommended deep breathing, the
voluntary holding of air in the lungs, believing that this exercise cleansed
the system of impurities and gave strength. This certainly is of great
value to you in your work in the world. Breathing exercises should be deep,
slow, rhythmic, and through the nose, not through the mouth. The most important
parts of deep breathing has to be regulating your breaths three to four seconds
in, and three to four seconds out.
|
| use diaphragm not stomach to breath |
1. Inhale through your nose, expanding your belly, then fill your chest. Counting to 5
2. Hold and Count to 3. Feel all your cells filled with golden, healing, balancing Sun light energy.
3. Exhale fully from slightly parted mouth and Feel all your cells releasing waste and emptying all old energy. Counting to 5.
Schedule your deep breathing exercise just as you would schedule important business appointments. Set aside a minimum of two 10 minute segments of time everyday although you can begin with two five minutes segments if you prefer.
Honouring yourself enough to schedule time with yourself is the first step in mastering stress. Tend your relationship with yourself and your relationship with life and with others will be enriched and deepened accordingly. Remember to share with your children and all your friends and loved ones so that they too can reap its untold benefits.
http://www.onepowerfulword.com/2010/10/18-benefits-of-deep-breathing-and-how.html
- See more at:
http://www.onepowerfulword.com/2010/10/18-benefits-of-deep-breathing-and-how.html#sthash.7qZscDz2.dpuf
published by LALI with sincere feeling to help others FROM THE FRAUDULENT WORLD OF MEDICINE. WHERE 80% OF AILMENTS CANNOT BE CURED.
THERE ARE NO MEDICINE TO REGENERATE BUT ONLY TO KILL. WHAT EVER THE TREATMENT THEY GIVE IS BY KILLING CUTTING REMOVING SOMETHING Often this result in grave errors for further deterioration THERE IS NO WORD -CURE- IN THE MODERN WORLD OF MEDICINE BUT -MANAGEMENT-. AND THAT MANAGEMENT IS ALWAYS BY TRIAL AND ERROR -TAKE CARE U CAN BE ANOTHER VICTIM OF THE TRAIL.
I am a victim of medicine hence the desire to share what i know.what i experienced. a medical drop out too.i AM NOT A DOCTOR -WHAT CAN A DOCTOR DO FINALLY WHEN ONE HAS TO GO HE WILL GO ANY WAY.AFTER LOOSING ALL WHAT HE HAS TO THE MEDICAL WORLD.INDUSTRY THAT THRIVE ON PROMISES BUT NEVER DELIVER.NEW PROMISES NEW FINDING NEW METHODS AND CREATING NEW DISEASES AT THE SAME TIME.WHY SHOULD THEY CURE WHEN THEY NEED PATIENT TO MAKE A LIVING.?? TALK TO STAFF AND SEE HEAR STORIES DOCS GET ANGRY WHEN THERE ARE NO PATIENTS. HEAR INSTRUCTIONS LIKE-TO HEY GO OUT TO STREET SEE ANY IS SICK.!
contact at lali@damaru.info or lali@laliasia.com
MORE AFTER YEARS OF LEARNING S THINKING BY SELF-- RELEASED AND AFTER LISTENING TO DEATH VERDICT OF SUPPOSED CARDIOLOGIST OF SRI LANKA
MY -lali-CONCLUSION IS THIS
medicine man have many names no cure but plenty of management till death do apart.
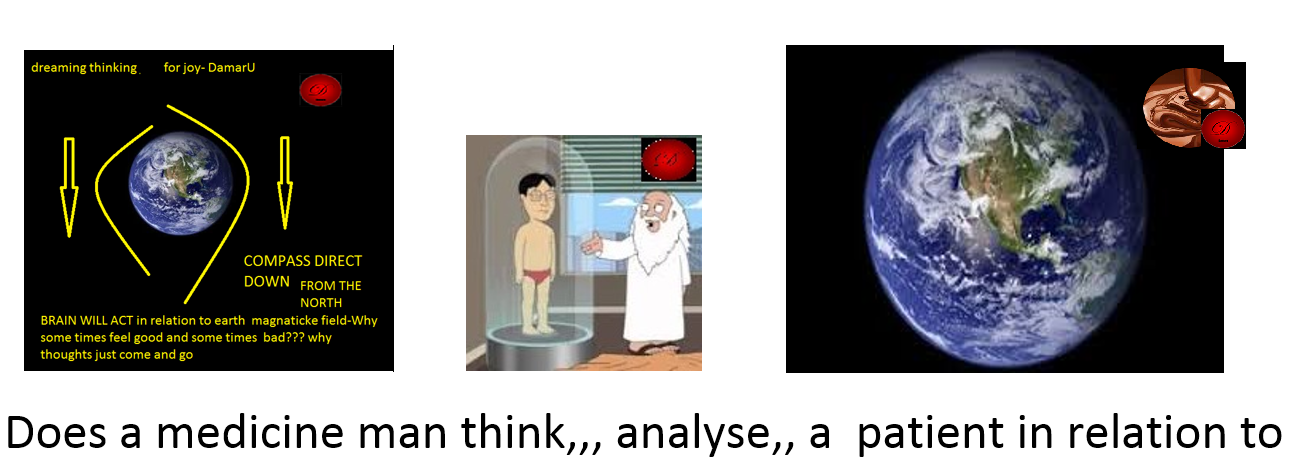
IT IS FUTILE TO GO TO MEDICINE MAN TO # TREAT HEAT R RHYTHM ABERRATIONS. THEY ARE NORMAL - FIGHT OR FLIGHT REACTION TO SURROUNDING -
published by LALI with sincere feeling to help others FROM THE FRAUDULENT WORLD OF MEDICINE. WHERE 80% OF AILMENTS CANNOT BE CURED.
THERE ARE NO MEDICINE TO REGENERATE BUT ONLY TO KILL. WHAT EVER THE TREATMENT THEY GIVE IS BY KILLING CUTTING REMOVING SOMETHING Often this result in grave errors for further deterioration THERE IS NO WORD -CURE- IN THE MODERN WORLD OF MEDICINE BUT -MANAGEMENT-. AND THAT MANAGEMENT IS ALWAYS BY TRIAL AND ERROR -TAKE CARE U CAN BE ANOTHER VICTIM OF THE TRAIL.
I am a victim of medicine hence the desire to share what i know.what i experienced. a medical drop out too.i AM NOT A DOCTOR -WHAT CAN A DOCTOR DO FINALLY WHEN ONE HAS TO GO HE WILL GO ANY WAY.AFTER LOOSING ALL WHAT HE HAS TO THE MEDICAL WORLD.INDUSTRY THAT THRIVE ON PROMISES BUT NEVER DELIVER.NEW PROMISES NEW FINDING NEW METHODS AND CREATING NEW DISEASES AT THE SAME TIME.WHY SHOULD THEY CURE WHEN THEY NEED PATIENT TO MAKE A LIVING.?? TALK TO STAFF AND SEE HEAR STORIES DOCS GET ANGRY WHEN THERE ARE NO PATIENTS. HEAR INSTRUCTIONS LIKE-TO HEY GO OUT TO STREET SEE ANY IS SICK.!
contact at lali@damaru.info or lali@laliasia.com
MORE AFTER YEARS OF LEARNING S THINKING BY SELF-- RELEASED AND AFTER LISTENING TO DEATH VERDICT OF SUPPOSED CARDIOLOGIST OF SRI LANKA
MY -lali-CONCLUSION IS THIS
medicine man have many names no cure but plenty of management till death do apart.
- Accelerated Idioventricular Rhythm.
- Accelerated Junctional Rhythm.
- Asystole.
- Atrial Fibrillation.
- Atrial Flutter.
- Bundle Branch Block.
- First Degree Heart Block.
- Idioventricular Rhythm


IT IS FUTILE TO GO TO MEDICINE MAN TO # TREAT HEAT R RHYTHM ABERRATIONS. THEY ARE NORMAL - FIGHT OR FLIGHT REACTION TO SURROUNDING -
Every sight perceived
generate a style of heart beat- a rhythm. Good sight generate a fine rhythm (G) -bad
sight gives a bad rhythm (B)
Over time -When
period of (A ) exceed period (B) --a bad
permanent rhythm gets fixed to heart .--Medicine man (they
know lots of words but do not understand thing how it
happens) will define this as aberrated , unnatural rhythm as arrhythmia, atrial
fibrillation, ectopic beat etc yes they give word but the do not understand
how it happen nor do they understand how to rectify – all the pills –cuts , shocks, they give ,create more problems
but will not solve heart rhythm problem.
What is the solutions?
MEDITATE-
DEEP BREATH CREATE A FINE MIND TO GENERATE A FINE RYTHEM OVER SOME ME YOUR HEAR
WILL GE TO NORMAL.
Lali- common
sense.
READ A LITTLE BIT MORE AT http://diy-lali.blogspot.my/2017/08/after-death-verdict-of-lanka-hospital.html ABOUT HEART BEATS.
READ A LITTLE BIT MORE AT http://diy-lali.blogspot.my/2017/08/after-death-verdict-of-lanka-hospital.html ABOUT HEART BEATS.
 |
| can an ailment be treated in isolation to all--- |